Pages

Thursday, November 29, 2012

Button Artwork

I found this project idea on pinterest (see here), and decided to try it myself.  It's a quick, fun project for a kid's room. 

Here's the end result:


Materials needed:
Canvas
Buttons
Paint and Brushes
Hot Glue Gun
Permanent Marker
Googly eyes (if you want!)

First, make a rough outline of the shape you are making and paint it in the color that most buttons will be.  This way, if there are gaps, the background color is the same. 


Next, hot glue on buttons, layering several and vary the shades of the color you are using (Be careful, the hot glue tends to seep through the button holes-ouch!).  Take a look at the picture from a few steps back-it's easy to just keep adding more and more buttons! 


I decided to have my elephant holding one big red balloon, but you could do several small balloons, several colors, etc.  I thought it would be cute to do a pink balloon for a girl's room.  I used a permanent marker to draw the string of the balloon. 

Last I added a little googly eye to the elephant (can you spot it?)  It doesn't stick out, but I think it looks pretty cute:)  Let it dry, and hang it up! 

View my post on the sign next the the elephant here

The site I found this idea on also had some other cute button projects.  My mom came up with her own idea-a letter H for their last name.  It turned out pretty cute, huh?   Feel free to try out these projects if you'd like!  I think it would be a cute idea for a baby shower of birthday gift too:)


Tuesday, November 20, 2012

Elijah's First Birthday!

That's right, our little boy is 1!  We can hardly believe it...this past year has gone by fast! 


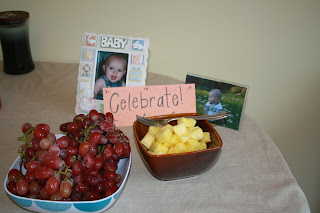
We celebrated Elijah's special day with a 'little man' party.  We had mustaches, ties, and lots of fun treats to eat.  Here is a recap in pictures:


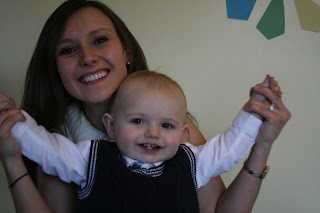
Our Little Man!


We had everyone put something into a time capsule for Elijah to open on his 18th (golden!) birthday.  Most people wrote a letter or added pictures. 


So Big!


Elijah thought the mustaches were pretty funny!


Matt making good use of the extra mustaches

Big Sister Bella was pretty excited for all the birthday fun

PRESENTS!


Our sweet pug Cayman was such a good sport-she looks good with a 'stache, huh?!

Cake Time!


Cake Attacker!


Our son is 1!

Happy Birthday Elijah!  You are such a wonderful part of our family and we are so happy and blessed that you are our son.  We love you so much!  We pray that the Lord will continue to bless your life. 


Friday, November 16, 2012

Traffic Jam!

There's a jam-up on the corner of Elijah Lane and Bella Boulevard.

Looks like it's cleared up!

Traffic is speeding up

Everyone looks happy during their morning commute

Just remember, it's not a race.

Don't forget to check your blind spot

Look out for drivers who aren't watching the road

Oh no!

Now what's a boy to do?

This is a tricky situation-what will happen next????

I think she's got an idea......


Hmm....didn't see that one coming!

Happy Commuting:)

Thursday, November 15, 2012

Two Easy Kid Crafts

I have been looking for some easy crafts to do with Bella for the Thanksgiving season.  I found one that looked pretty easy and fun, so we tried it out.  I completed the assembly while Bella took a nap, and let her try it out once she woke up.  I ended up having some extra material at the end, so I made another easy project for her with the scraps. 

The first project is the button up Turkey!

Here are the supplies you'll need:

(not all materials shown)
Pieces of felt in a variety of colors
Scissors
Five Buttons
Needle and Thread
Hot glue gun
Black Permanent Marker

Using one of your pieces of felt, measure two circles of equal size.  I used a cool whip container to trace two equal circles.  Cut them out, and sew them together along the edge (or you could hot glue them together).  I did not add any stuffing to the turkey, but you can if you want.  Next, sew on five buttons along the edge of the turkey, about an inch apart. 


Next, cut out 5 feathers (5 different colors works best). Cut a slit in each feather so that they can fit onto the buttons. 
Finally, draw on a turkey head with the permanent marker, and add eyes, beak, and snood (red thing-don't worry, I looked it up!). 


Yay!  Now it's time to try buttoning on the feathers.  Another idea I thought would be fun with this is to have your child think of things they are thankful for and write one thing on each feather.  You can work on fine motor skills with the buttoning, as well as colors and matching. 

Second Project: Felt Pizza


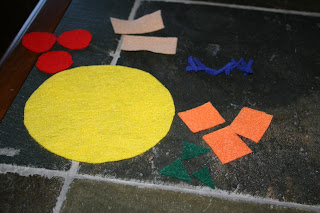
When I was done with the turkey project, I had extra felt.  I decided to make a felt pizza for Bella.  Super simple!  Just cut out a large circle for the pizza crust (I used the same size as the turkey body).  Then I cut out different shapes in each color for toppings.  Fun and easy!


Well, I hope you enjoyed these simple craft ideas!  Happy Thursday:)